アクセス担当のまみです。
納品伝票等印刷する際に、現在日付を時刻まで印刷したいってことがあります。
フォームに現在日付を時刻まで表示したいってこともあるかもしれません。
データを登録する際に日付が時刻まであると、一日のうちで何時に注文が多い等のデータ解析ができますね。
Now関数を使うと、現在日付を時刻まで表示してくれますよ!
Contents
レポートでNow関数を使用する


ではレポートにNow関数を使って現在日付を時刻まで表示してみましょう。

リボンの①「作成」タブから②「レポートデザイン」を選択し、テキストボックスを1つ配置します。
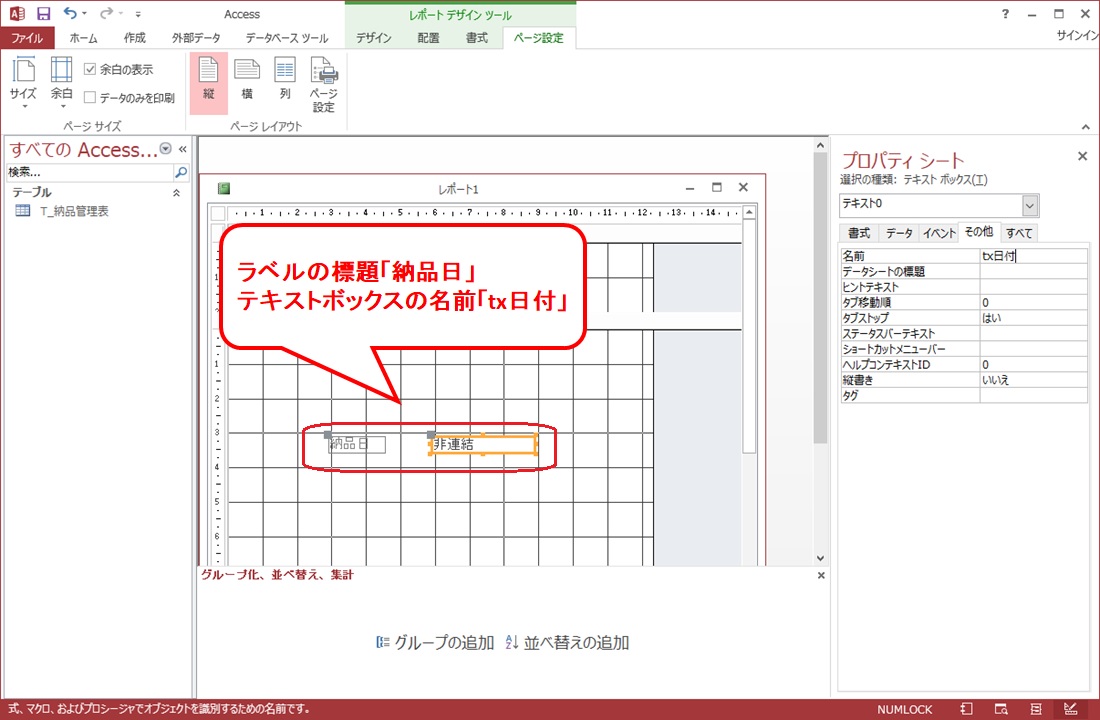
ラベルの標題とテキストボックスの名前を下記のとおりにしておきましょう。
| ラベルの標題 | テキストボックスの名前 |
| 本日の日付 | tx日付 |
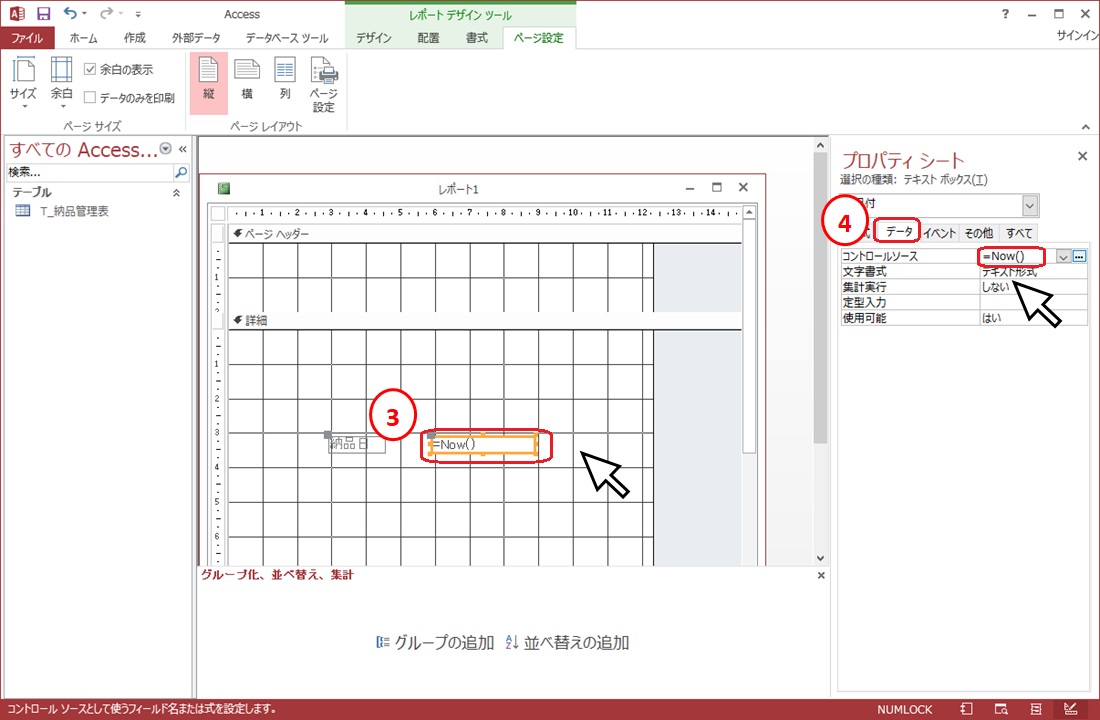
③「tx日付」を選択した状態で、プロパティシートの④「データ」タブの「コントロールソース」に「=Now()」と入力します。
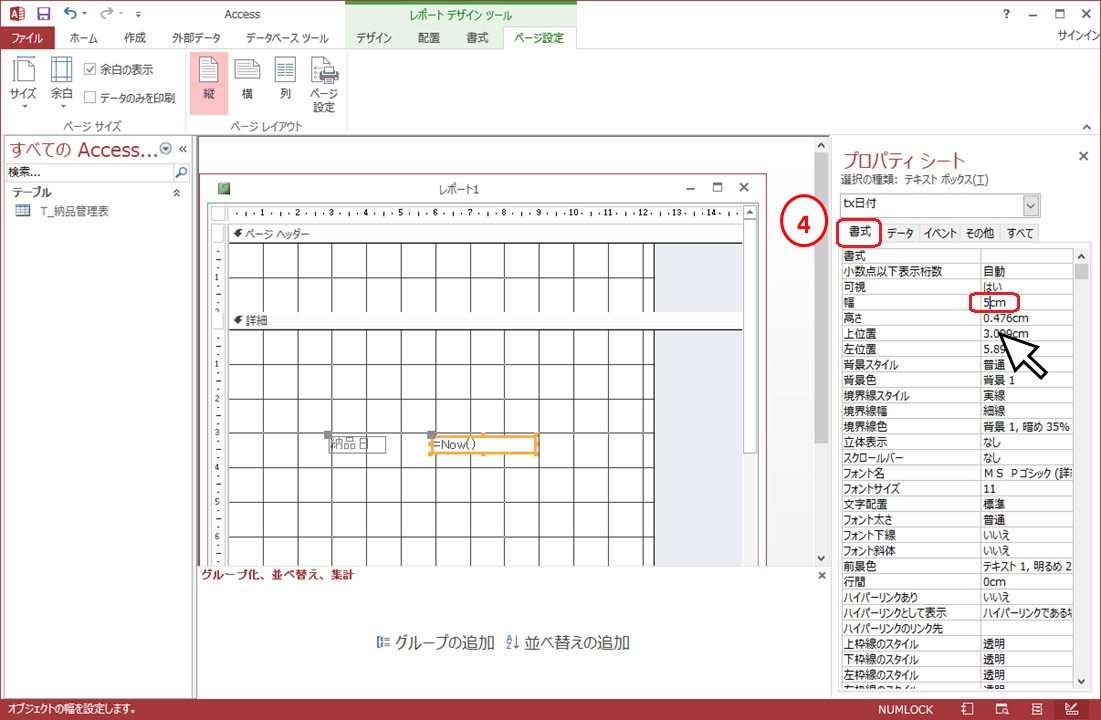
プロパティーシートの④「書式」タブから幅を「5cm」にします。

レポートは「R_日時の表示」と名前をつけておきましょう。
フォームでNow関数を使用する

リボンの①「作成」タブから②「フォームデザイン」を選択しテキストボックスを1つ配置します。

| ラベルの標題 | テキストボックスの名前 |
| 日付 | tx日付 |
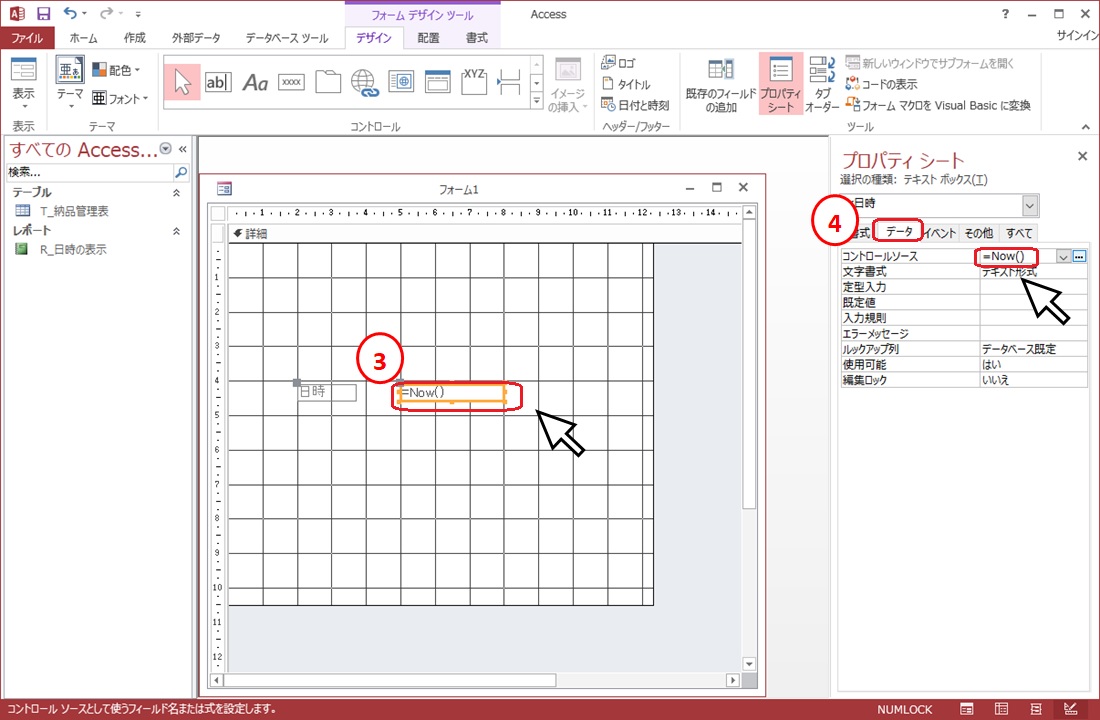
③「tx日付」を選択した状態で、プロパティシートの④「データ」タブの「コントロールソース」に「=Now()」と入力します。
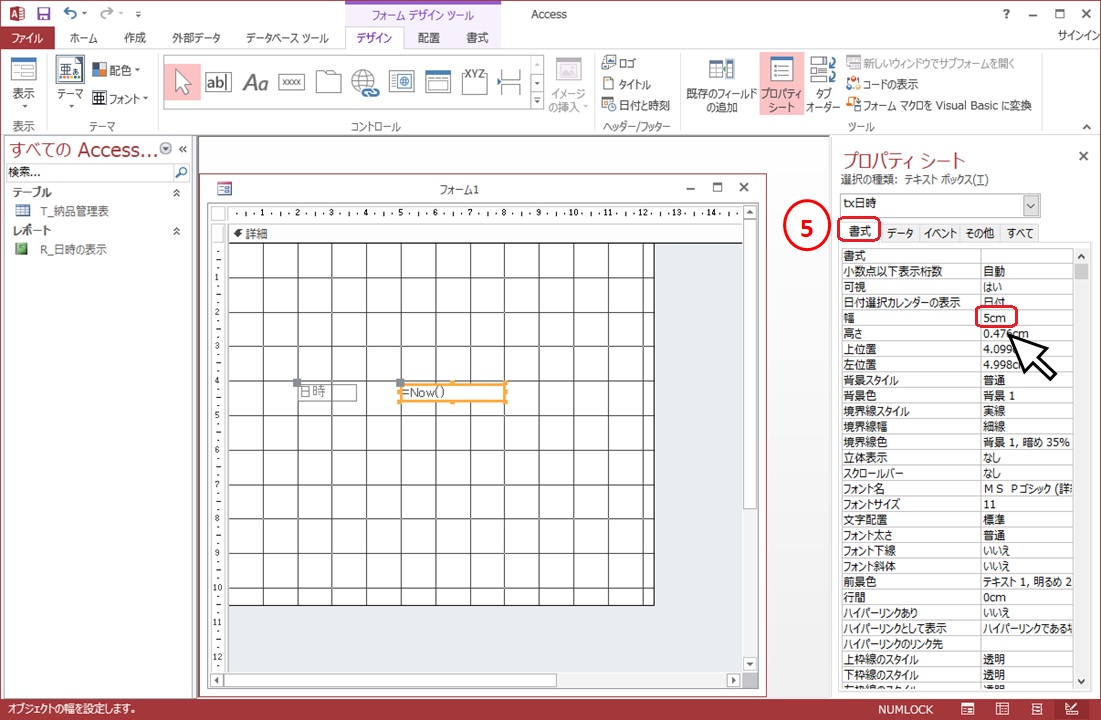
プロパティーシートの⑤「書式」タブから幅を「5cm」にしておきましょう。
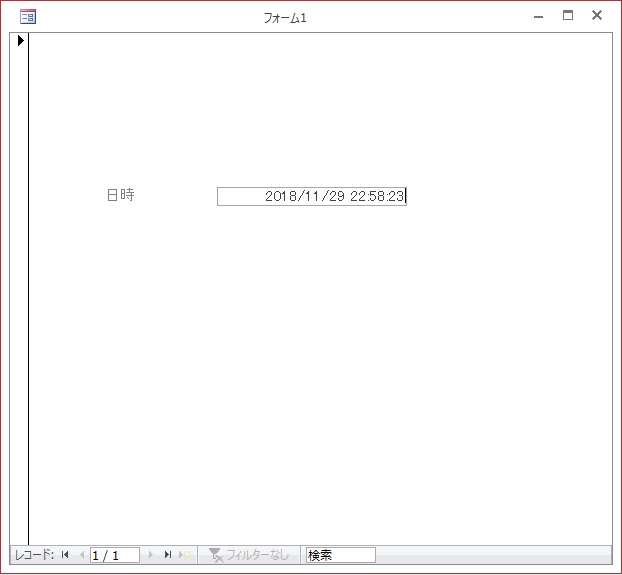
フォームには「F_日時の表示」と名前をつけておきましょう。
[quads id=2]
テーブルに日時を登録する
テーブルに日時を登録する方法ってVBAを使ってフォームから登録する方法と、既定値を使用する方法とあります。
VBAを使っての登録方法は下記の記事にゆずりますので興味がありましたら読んでみてくださいね!

使用するテーブル
「T_納品管理表」
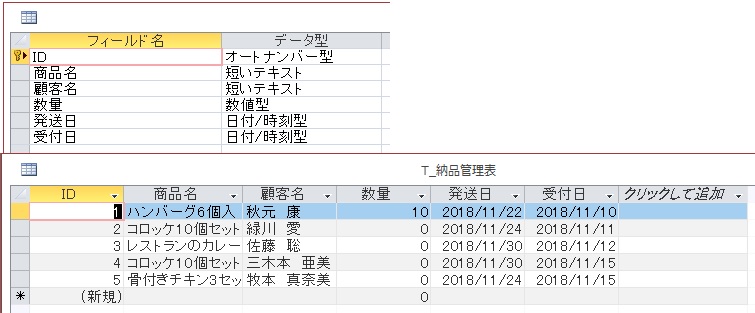
「T_納品管理表」をデザインビューで開きます。
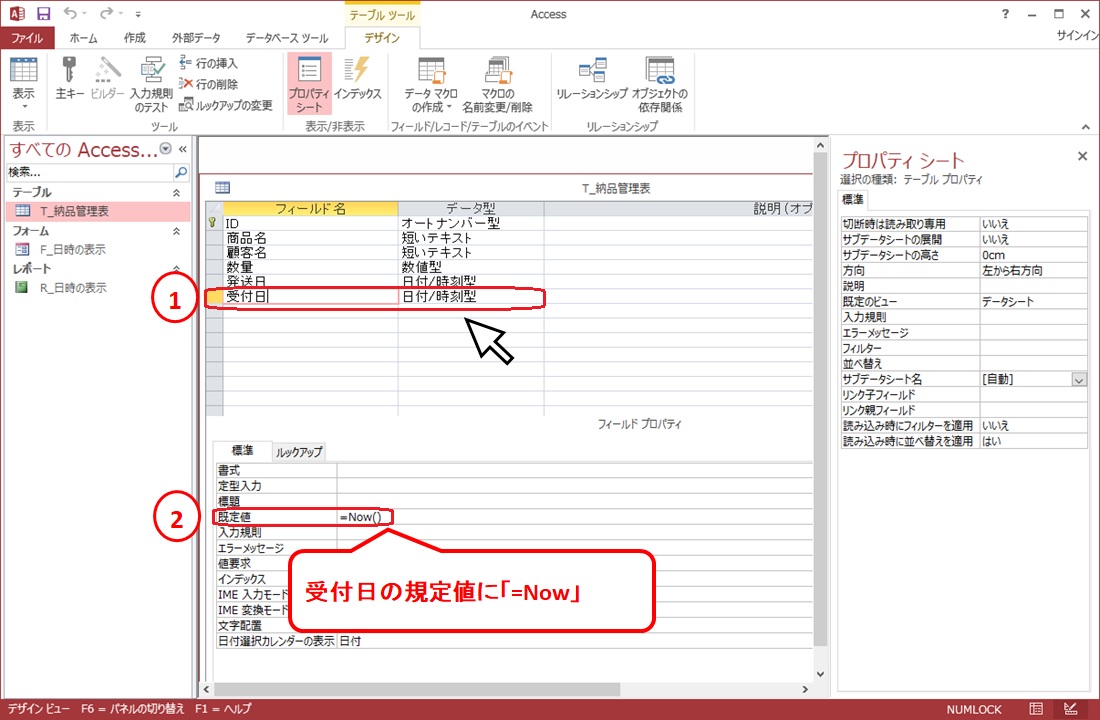
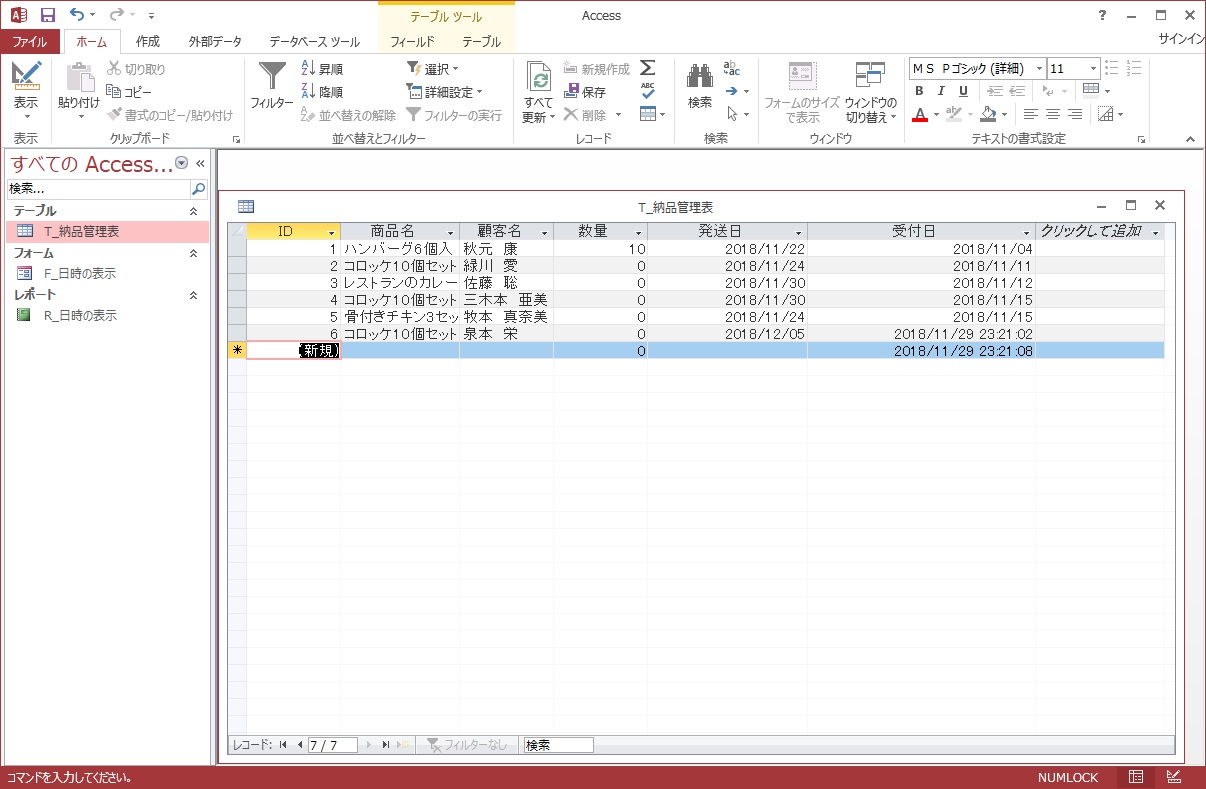
①受付日を選択し②規定値に「=Now」と入力します。
クエリで日付の表示にしてデータを抽出する
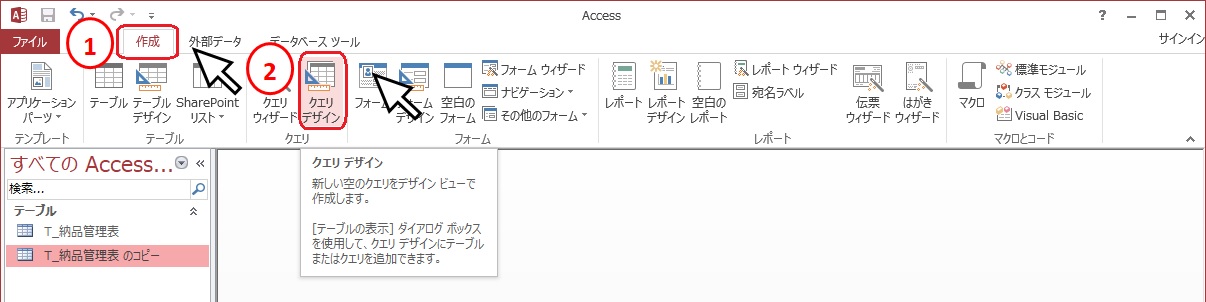
リボンの①「作成」タブから「クエリデザイン」を選択し、「T_納品管理表」を追加します。
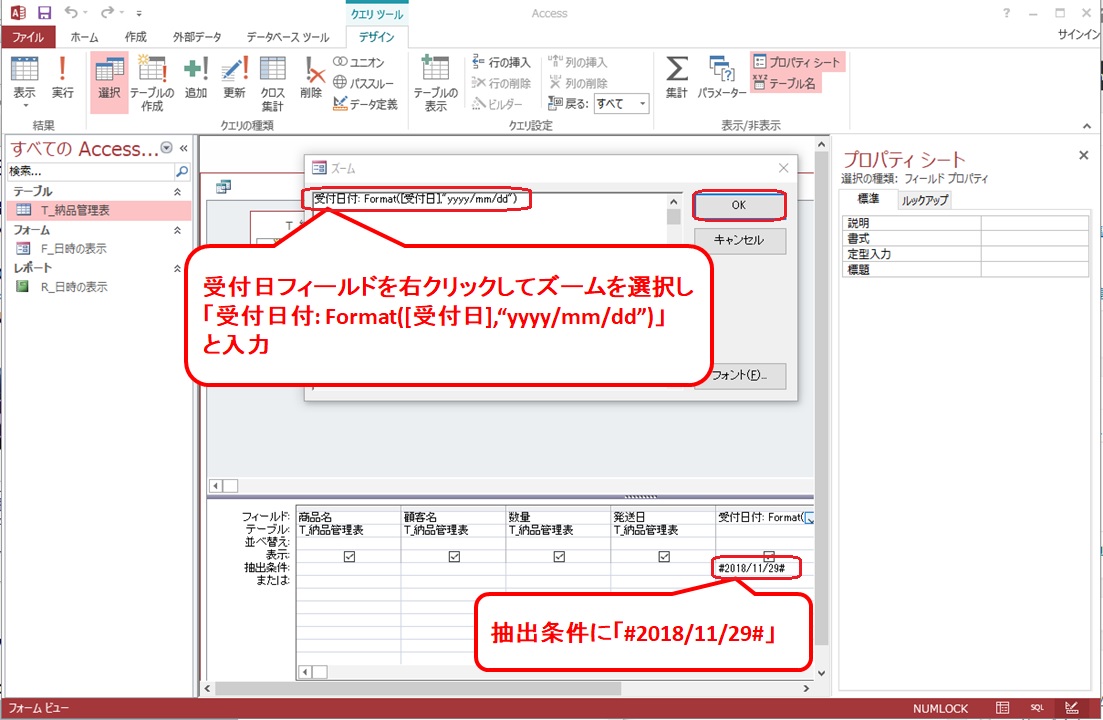
受付日フィールドを右クリックして「ズーム」を選び「受付日付: Format([受付日],”yyyy/mm/dd”)」と入力して「OK」を左クリックします。
抽出条件には「#2018/11/29#」と入力しましょう。
抽出結果

クエリは「Q_データ抽出」と名前をつけておきましょう。
まとめ
今日の日付を時間まで表示したい時にNow関数を知っていると簡単に表示できます。
日付の表示にしたい時にはクエリを使ってくださいね!